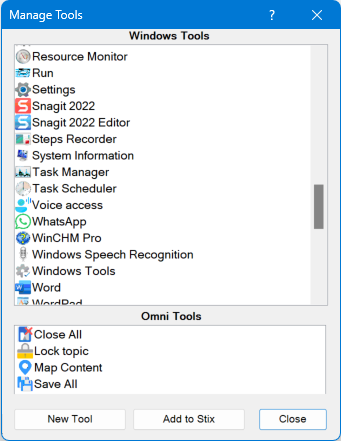
Manage Tools

This window contains the links to the Tools you can add to the ToolStix panels or launch the Tool directly from this window.
The window consists of two panels. Drag the bottom of the top panel (a small drag icon will appear) to adjust the height of the panels
In this panel you see:
Note: some Windows utilities and support programs are ignored.
You may find programs that you do not need here and would like to remove them from the list.
Right-click on a program and click the Remove. The program will be blacklisted and will no longer appear in this panel.
OmniStix automatically populates this list each time a user launches this window. It cannot be edited. You can either remove the program from this list (blacklist it) or copy it to the bottom panel, where you can change the program name and icon and add a tooltip.
To do this, click the Copy to Omni Tools within the item context menu.
Double click a program to run the program.
In this panel you can see:
Tool context menu allows you to delete or edit a tool.
Double-click a tool to run the tool.
Add to Stix button
Selected tool will be added to your Tool Stix.
If you have several Tool Stix, a list of your Tool Stix will appear, select the needed Stix from this list.
New Tool button
Opens a window:

Specify the path to the file or paste the web page address.
The Tool Title will generate automatically. You can then change the name.
The Tool Icon will generate automatically. To change the icon click on it and select a new icon.
You can provide a Tooltip (not required, but useful to describe the Tool).