The OmniStix add-in allows users to work much faster and easier within MindManager and adds new features to the MindManager, such as voice notes or very fast search for the needed data in the MindManager maps, without even opening them.
OmniStix provides users with a set of compact and movable visual panels called Stix to ensure that essential MindManager elements and commands are always at hand.
Let’s look at the most straightforward OmniStix panel:
IconStix
![]()
Users can easily add icons to an IconStix panel. For example, drag and drop icons from the MindManager icon library onto the panel (or use other built-in methods).
Select map topics and click on the desired icon on the Stix panel to add the icon to the selected topics.
Users can create different IconStix panels and save them for future use.
![]()
![]()
Accessing OmniStix panels
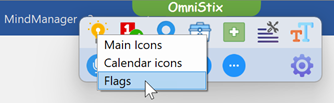
Users can easily access the OmniStix panels through the OmniStix button at the top of the MindManager Window. Just hover over the button with your mouse to open the OmniStix Start Menu, revealing all the Stix as well as the other OmniStix features:

The top row displays the Stix panels. The bottom row displays other OmniStix features.
The IconStix is the leftmost one (lightbilb icon) in this menu. Click icon to open the IconStix panel. If there are several IconStix panels, select the one you need:
TaskStix
Users often need specific commands and elements to markup the task topics when working on a project or tasks. The TaskStix panel makes this work easier:
![]()
This Stix almost wholly replaces the MindManager Task Info task pane. It is significantly more compact, preserving precious workspace while giving users a versatile panel with access to the main task attributes.
Right-clicking on the Progress and Priority icons reveals other value choices:
![]()
![]()
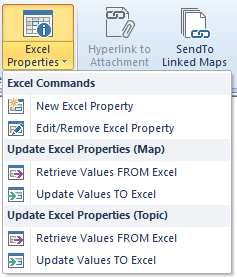
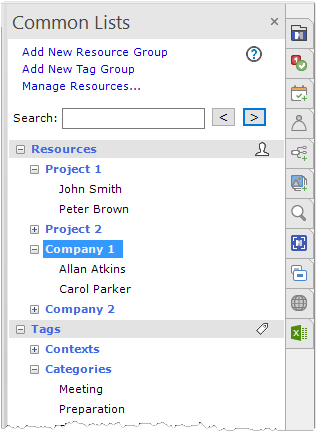
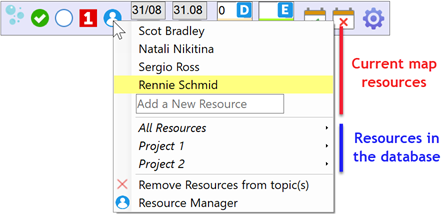
Clicking the Resources button reveals current map and global task Resources, and options to add new Resources or manage existing Resources within the database:
Use the TaskStix to set the task Start and Due dates, task Duration (D) and Effort (E).
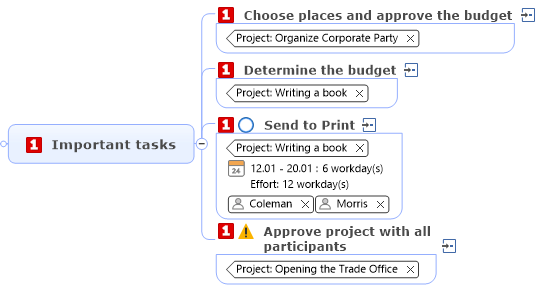
The TaskStix’s unique feature is the Quick Topic templates:
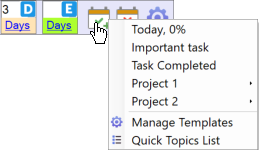
Quick Topic Templates enable users to define and add several topic attributes with a single mouse click.
For example:
The Today, 0% template adds today’s Start and Due date to the topic, with a Progress 0% icon.
The Important task template adds today’s Start and Due dates, with a Priority 1 icon to the selected topic(s).
The Task Completed adds a Progress 100% icon and today’s Due date.
Users can create more complex templates that add up to 6 different attributes to a topic (including task resources, icons and tags), enabling them to define and apply uniform project-specific tasks.
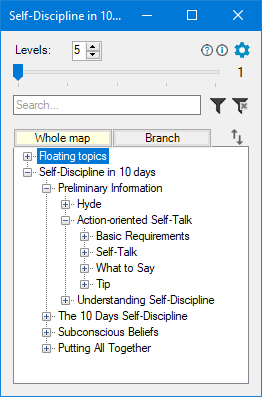
NavStix
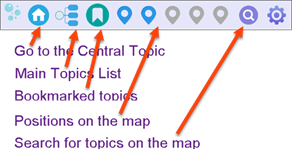
The NavStix enables users to navigate maps with ease.
It instantly generates the map contents (main topics list) and stores key topic locations and key map positions, allowing users to quickly move between them while working.
It can find topics with the required text on the fly, view them and quickly return to the initial position.
ToolStix
![]()
You can add links to any program or document to the ToolStix panel to open them directly from the panel.
The ToolStix knows all the programs installed on your computer. You just have to select the desired program from the list and add it to the ToolStix panel.
Do you know that Windows includes over 40 built-in programs? Some are very familiar, such as Notepad, Calculator, Calendar, Snipping Tool. ToolStix will introduce you to all these apps and add any of these apps to the ToolStix panels.
TopicStix
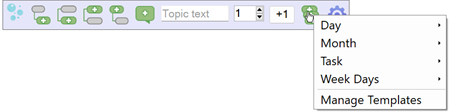
The TopicStix lets users add and place topics into positions relative to the selected topic, as a subtopic, a topic before, the next topic, as the parent topic, or as a callout.
Users can also add multiple topics with specific text using different algorithms. For example, uesers can within a few seconds configure TopicStix to insert 30 subtopics with the text “Day n” (Day 1, Day 2, Day 3 … Day 30).
Users can also use predefined templates and design their own to add multiple topics to a map.
TextStix
![]()
The TextStix panel will become indispensable for users who intensively collect information from Internet sources or documents.
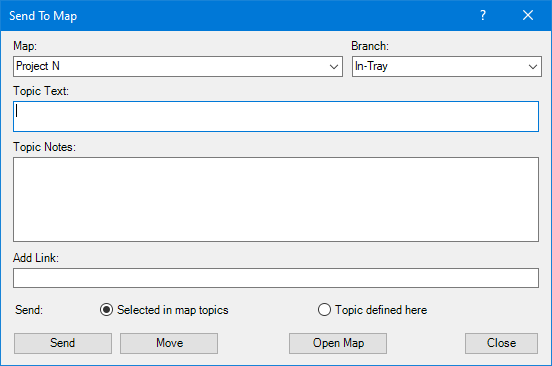
Users can paste text directly to a topic or to a relative position to the topic (as a topic before, the next topic, the parent topic, or as a callout). Alternatively, they can paste text as a link or send it to the topic notes on the selected topic.
Furthermore, users can use the option section (yellow-shaded block) to set various pasting options. For example, to paste text as formatted or unformatted, replace the topic text or notes or append the text, etc.
TopicStix can automatically add a link to the text source and “pull” the links from the copied text, even the text is pasting as unformatted.
When copying long text, map topics usually look untidy (narrow and tall columns of text). Users have to adjust the topic widths individually, topic per topic. This is quite annoying when you are working intensively on collecting information. With the TextStix you can adjust the widths of all the selected topics with one click.
Or simply enable the Auto-Width option to adjust topic widths automatically depending on the length of the topic text. The map topics will be proportional and neat without any intervention from the user.
FormatStix
![]()
The FormatStix doesn’t need any detailed explanation. It gathers the main formatting commands into a clear, convenient and easily locatable panel.
Particularly convenient is that there are three colors for the topic text and the topic fill. This is sufficient 98% of the time. Naturally, the colors can be customized to your liking.
The next version will provide formatting templates, allowing users to apply formatting with a single mouse click. These will work like MindManager Topic Styles, but with portability between maps and utilising the convenient functionality built into OmniStix.
In addition to the Stix, OmniStix provides a number of other features that will greatly help users working in MindManager.
Working with Topic Notes
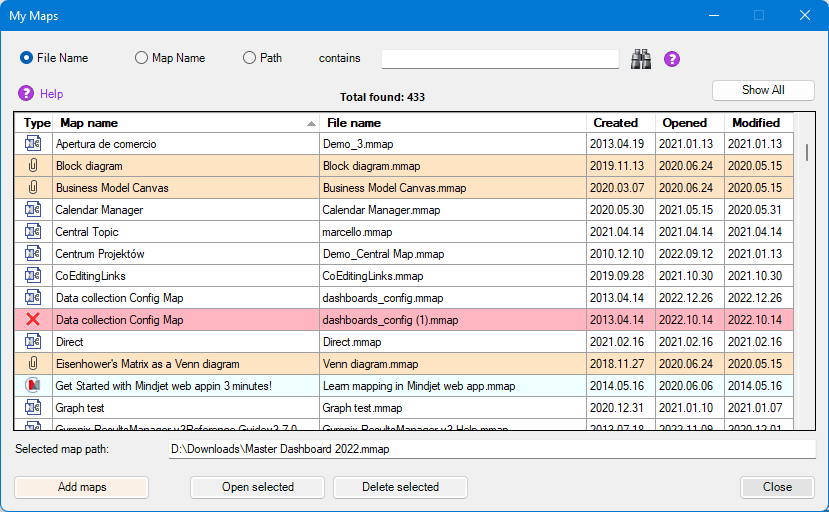
OmniStix can search multiple maps for topic notes containing the searched text, without opening them. MindManager also can do this. However:
- OmniStix performs searches much faster (OmniStix found the relevant topic notes in 43 maps with over 2,000 topics with notes in 8 seconds).
- You can specify multiple search words, and OmniStix will also search for those words in the topic notes. MindManager always searches for the exact phrase.
For example, a user can search for topic notes that contain the text “pulse”, “pressure”, or “rhythm.” In MindManager, users would need to do three searches, and each search will discard the results of the previous search. - OmniStix allows users to more flexibly specify the search maps or folders.
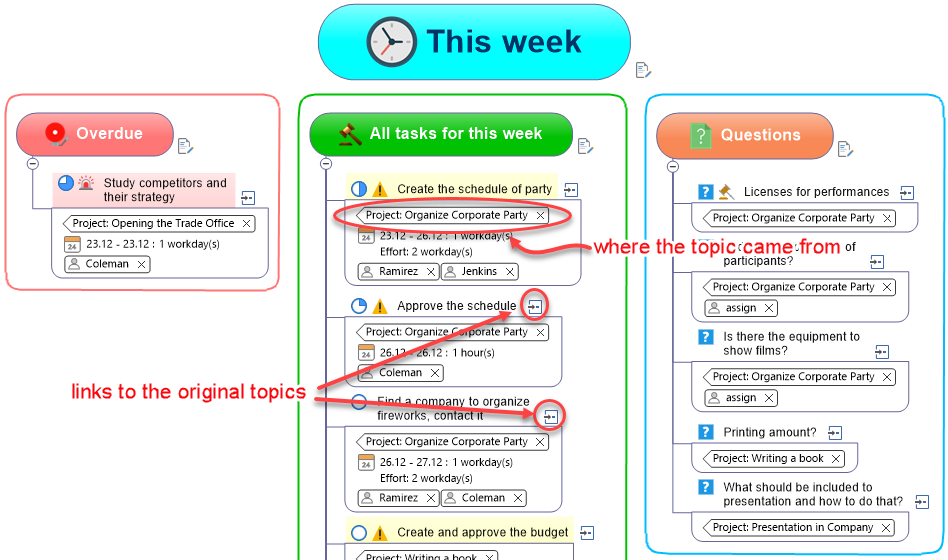
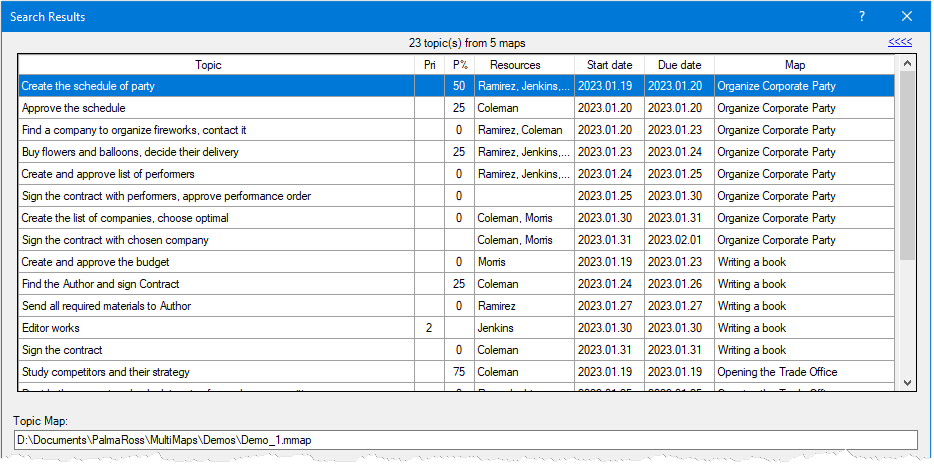
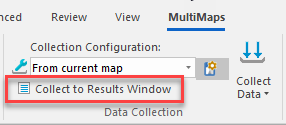
- Remarkably, OmniStix displays the search results in a separate window, where users can view not only the topics, but also view and edit their notes, without opening the maps or going to those topics (of course, user can click on a topic to go to it). The following picture shows the search results for topic notes containing the “cardio” and “heart” text within several maps.
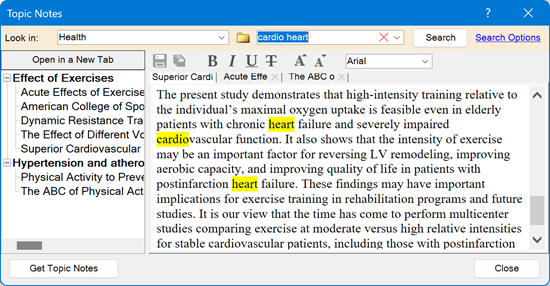
You will immediately appreciate the convenience and productivity of working with notes from multiple topics in the OmniStix Topic Notes window, without jumping from one topic to another on the map.
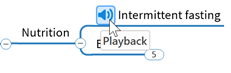
Audio functionality
Easily add voice notes to map topics. OmniStix adds a special command to the topic context menu:

Play these voice notes with one click:
Or record voice notes and save them for later use:
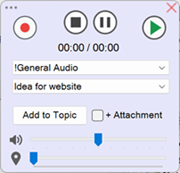
Users can even create audio notes from the webinar and other sound sources.
All audio notes are saved in a database, where users can easily play and manage them.
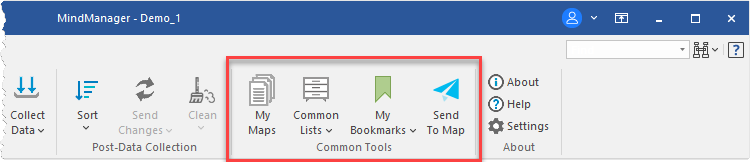
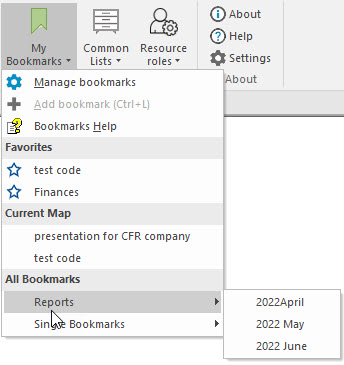
Bookmarks
Bookmark topics and return to them anytime by clicking on the bookmark in the Bookmarks window.
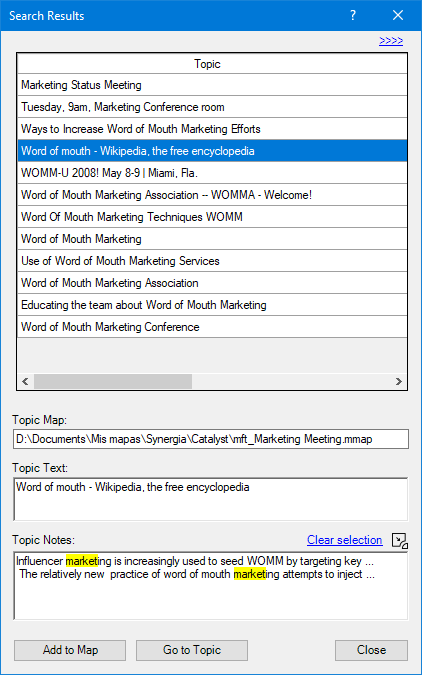
OmniLinks
OmniLinks is a database where users can add links to anything.
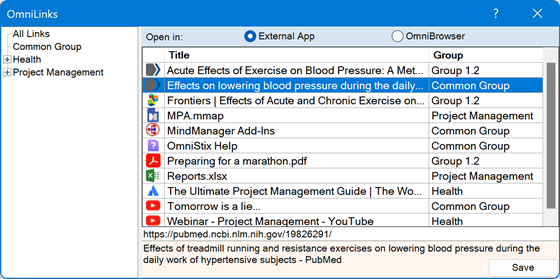
The link icon lets you immediately see the type of link, such as a web page, a Word document, an Excel spreadsheet, etc.
Users can gather links into groups and sort them by document type, groups, or name.
Users can download a web page and add a link to the downloaded file. This is helpful for:
- Viewing web pages when there is no internet connection.
- Keeping a copy of essential web pages that may become deleted or unavailable.
We’ve covered about two-thirds of the available OmniStix features. The rest you’ll discover when using the OmniStix.
This is an initial version of OmniStix. We are going to improve this functionality with other powerful, user-friendly and modern (AI!) features.


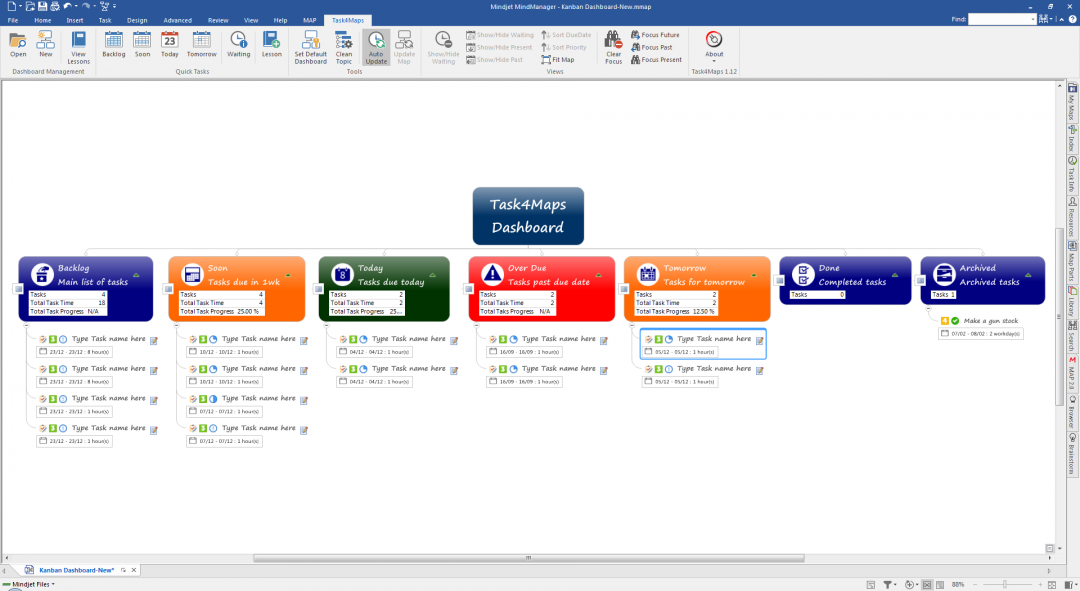
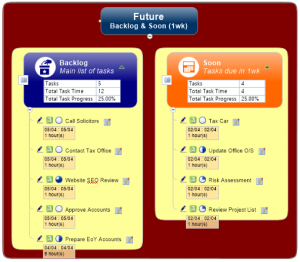 The main categories and sub-categories in Task4Maps are contained within Boundaries and as tasks are added or removed from categories/sub-categories the boundaries shrink or grow to accommodate the tasks. This provides you a quick, visual way of seeing which categories/sub-categories contain the most tasks and help you focus on specific categories/sub-categories as required.
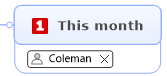
 Task4Maps can be used in two modes; fully automated or manual. When the Auto-Schedule feature is enabled, Task4Maps will automatically move your tasks between sub-categories depending on the proximity of the task due date or its percentage complete.
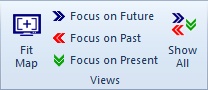 Focus…on what’s Important!
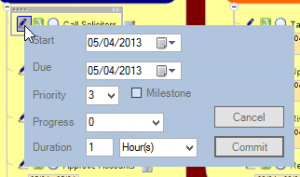 Topic Editor
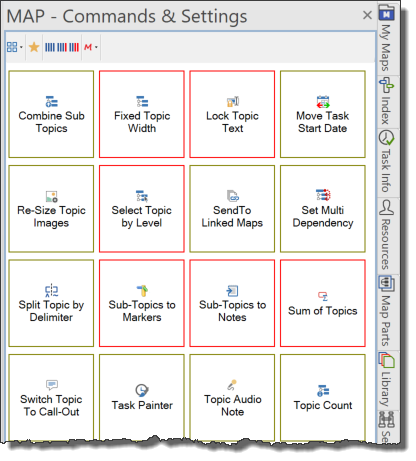

 MAP Favourites