|
Send event
|
 
|
|
Send event
|
|
Select the map topic you want to send to your calendar as an event.
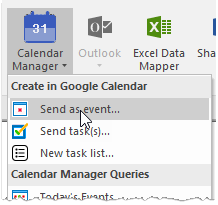
Select Send as event... from the Calendar Manager button drop-down menu:
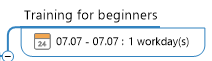
The Create event dialog window opens where you can add the rest of the event data. Click on the Create button creates the event in the selected calendar, and the map topic now looks like:
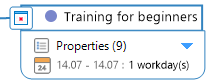
On the topic left there is an icon indicating that this is an event topic, sinchronized with Google Calendar. The topic has several properties where you can see additional information about the event.
A special case exists when you create a topic via an Outlook Query. For example, you have the following Outlook query:

And we want to duplicate this Outlook appointment - send it to a Google Calendar.
To duplicate this Outlook appointment and send it to a Google Calendar, you select the topic and click a Create event... command. A window appears with the event name, date and time, and location filled in:
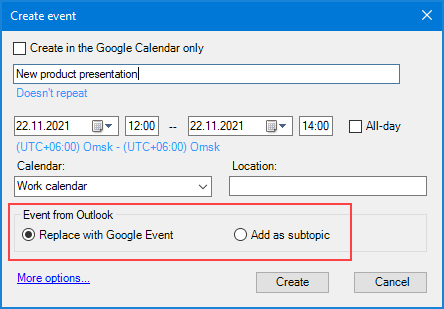
You can choose to replace the Outlook topic with the Calendar Manager topic by selecting the Replace with Google Event radio button (this topic will no longer synchronize with Outlook), or add the Event topic as a subtopic (Add as subtopic radio button) to the Outlook topic:

-----------------------------------------------------------------------------------------
Let’s take a closer look to the Create event window:
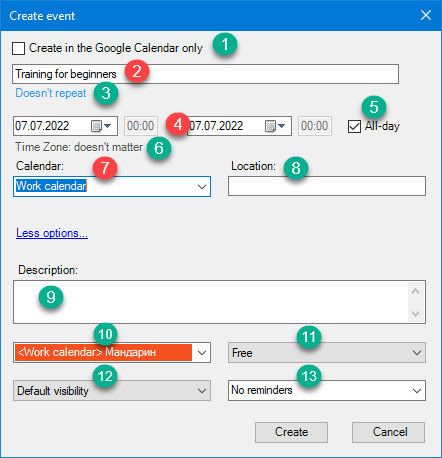
This figure identifies Mandatory fields with red numbers and Optional fields with green numbers.
1. Check this option to create an event on the Google Calendar without adding the event to the map. Leave this option unchecked to create the event on Google Calendar and add it to the map.
2. Enter the event title.
3. Click on "Doesn't repeat" if you want to create a recurring event. See the Recurring Event topic.
4. Select the event's start and end dates.
5. Check this option to create an All-day event.
6. Click this option field to change the time zone for the event. Your location's time zone shows here when you create a timed event. The time zone is irrelevant for all-day events.
7. Select the Calendar where you want to create the event.
8. Indicate the Location where the event will take place.
9. Add an event description.
10. Select an event color. The event's calendar color is used as the default event color.
11. Select whether during the event you will be free or busy. This selection helps prevent double bookings.
12. Select whether the event is private or public. Calander settings determine the default status.
13. Set event reminders. Read more in the Event reminders.
Click the Create button after you populate the fields.