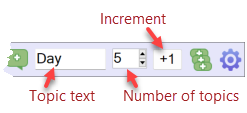
The TopicStix provides users with a quick and convenient set of actions to define, add and place topics within a map. These actions help users to

The most-left and most-right icons are described here.
Select a topic and click a button to add a topic to the map. The left five buttons add topics as follows:


----------------------------
You can select multiple topics in the map. New topics will be added to the all selected topics according to the button's function.

1. Enter the Topic text. For example, "Day".
2. Enter the required Number of topics (5).
3. Select a topic on the map and click on the button that will place the topic according to your needs.
OmniStix adds 5 "Day" topics according to the chosen button.
Add with increment:
1. Enter the Topic text. For example, "Day ". [Note: the space at the end of the text]
2. Enter the required Number of topics (5).
3. Click the Increment button (+1). The button activates (becomes "highlighted").
4. Select a topic on the map and click on the button that will place the topic according to your needs.
OmniStix adds 5 topics: Day 1, Day 2, Day 3, Day 4, Day 5.
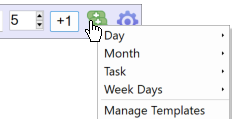
Click on the button:

Click on a template in the context window to add predefined topics to the map.
For example, the Day template will add 10 subtopics to the selected topic with the text: Day 1, Day 2... Day 10.
The Week Days template will add the names of the days of the week to the selected topic (Monday, Tuesday, etc.).
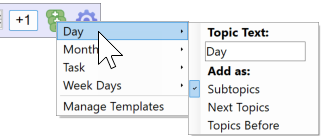
You can vary the contents of the template. Hover your mouse over the template to open a submenu:

You can enter alternative Topic Text and choose how the OmniStix will add topics (as Subtopics, as Next Topics or Topics Before).
Then, click on the template.
Of course, you can create your own templates to insert multiple map topics. See How to Create Templates.